How To Make a Minimalistic Logo in Photoshop + Illustrator (A Step by Step Tutorial)
In this tutorial, we are going to make a MOUNTSTRIPE COTTAGE logo using Photoshop and Illustrator CC 2015 in minimalistic design style.
Every professional logo always had the idea or the meaning behind it. In this logo, the idea is to make a combination of the word “M”, cottages, mountain and the stripe. If you wonder what the stripes mean, stripe is straight so is the point of the company, it goes straight toward the comfort of the cottage.
Here the final logo that you’ll be create:

Time estimation to create this logo is about 3-4 hours.
Okay, now you’ve already know the meaning behind the logo and the time estimation to create it, so let’s get started!
Download The Logo for Free:
[sociallocker]Mounstripe Cottage Logo (PSD)[/sociallocker]
Photoshop Section
Step 1.
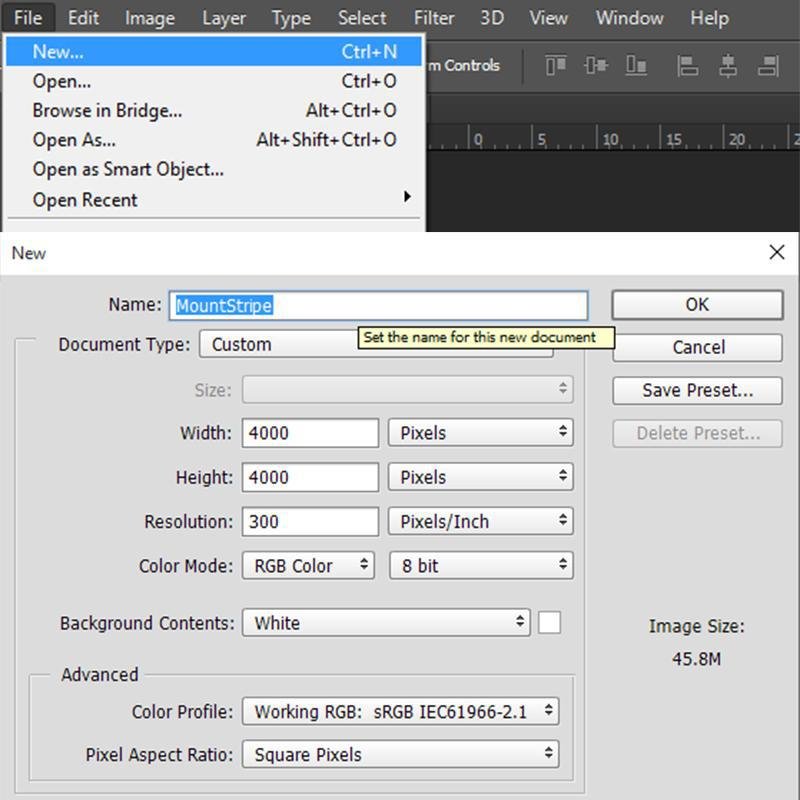
First, create a new file in Photoshop, input “MountStripe” as the file name, set the width and height at 4000px and set the resolution at 300.
Before we proceed to step 2, make sure you have the font first which are “Anders” and “Mohave”. They are free font, you can download them here:
Anders Font: Free Download
Mohave Font: Free Download
Step 2.
Now, the important part of the logo is a font name “Anders”. Choose the font first, click the type tool (T), set the size into 1033 pt, set the color to black, and then type capital “A”. You can see the picture below for the tools place.

Step 3.
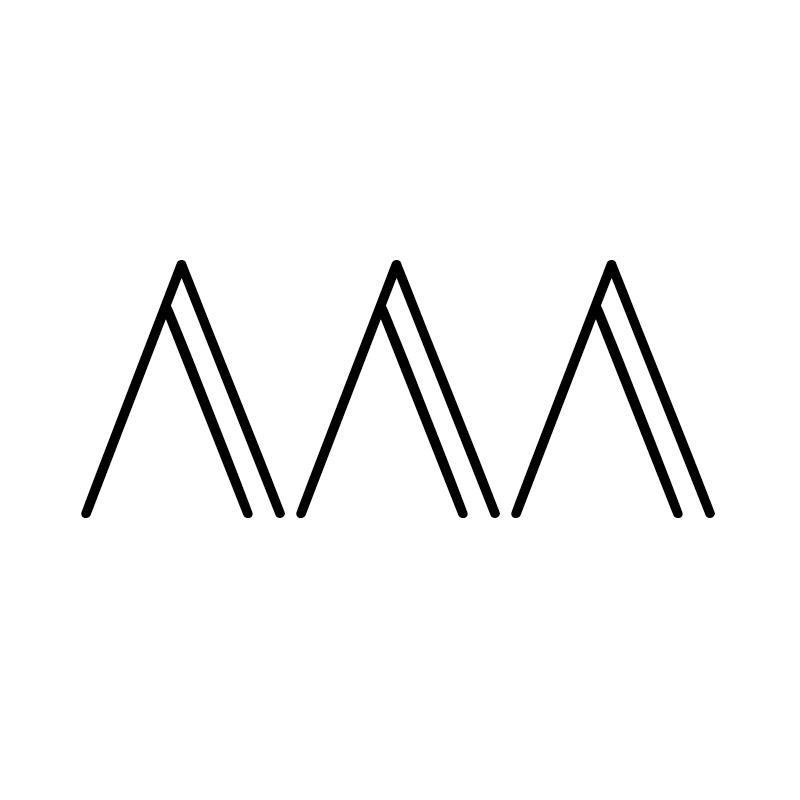
When you done typing your first “A”. It’s time to duplicate (Ctrl + J) it into 3 layers. After that, just move the letter to the right. Make sure to hit shift while moving the letter so they will be perfectly aligned.
Step 4.
Here’s the tricky part, rotate (Ctrl + T) the “A” in the middle by 180 degrees so it becomes “V”. Make sure to hit shift while rotating.

Step 5.
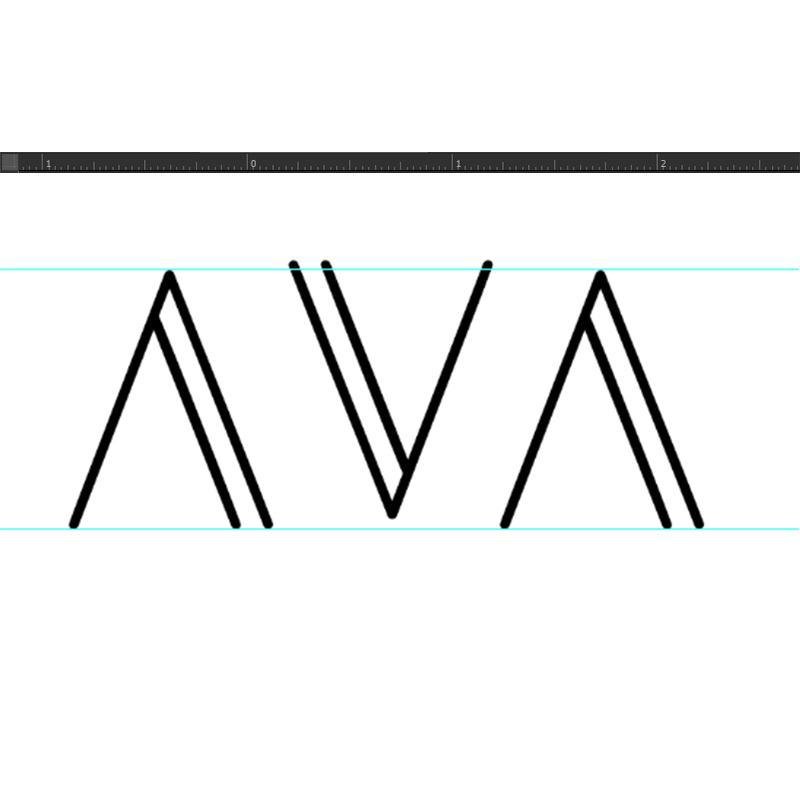
After being rotated, make sure to show the ruler up (Ctrl + R), and pull the horizontal ruler twice and align it to the top and bottom of “A”.
Step 6.
Align the letter “V” with the ruler, and combine all the 3 letters (not the layers). Make sure the line combined perfectly so that it’s become “M”.

Step 7.
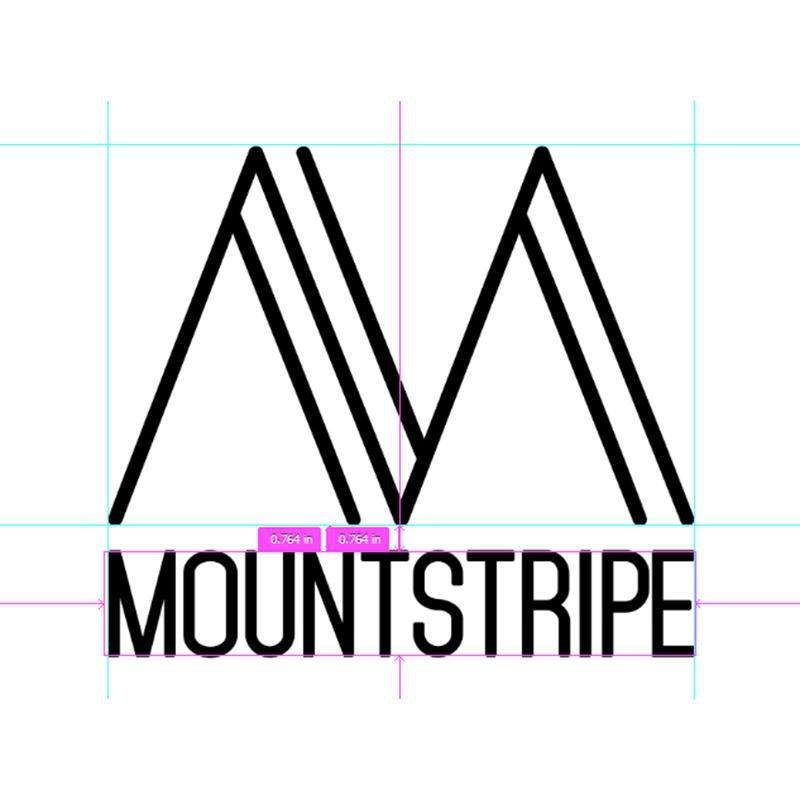
Now, we type the company name “MOUNTSTRIPE” using “Mohave” font, size 277pt and bold. Put it, below the “M” with a space between them is 0.764 in (hold Ctrl to see). If not sure how to make it align, pull the vertical ruler for a guide line.
Step 8.
You can type again the word “COTTAGE” with the same font and style but with size 85 pt, put it below the word “MOUNSTRIPE” with the space between them 0.474 in.

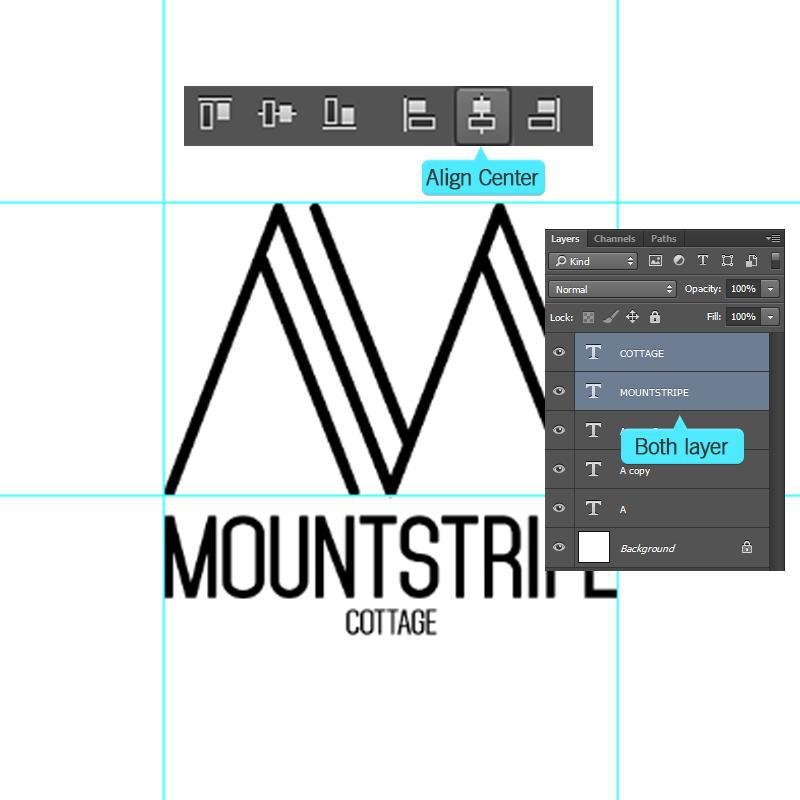
If you are not sure how to make the word “COTTAGE” center align with the word “MOUNTSTRIPE”, you can select both layer, then press V and choose “Align Horizontal Centers”.
Step 9.
We are nearly done, now we just have to create two lines. Use pen tool (P) and make sure it’s on shape, change the stroke color to black, set the size to 16 pt and then choose the stroke option.
Click the caps then choose the second option and click the corner then choose the second option.

Step 10.
After finished setting the pen tool, click the first anchor point. While holding shift, click the second anchor point near the word “COTTAGE”. Duplicate (Ctrl + J) it, and put it on the other side of the word “COTTAGE”.
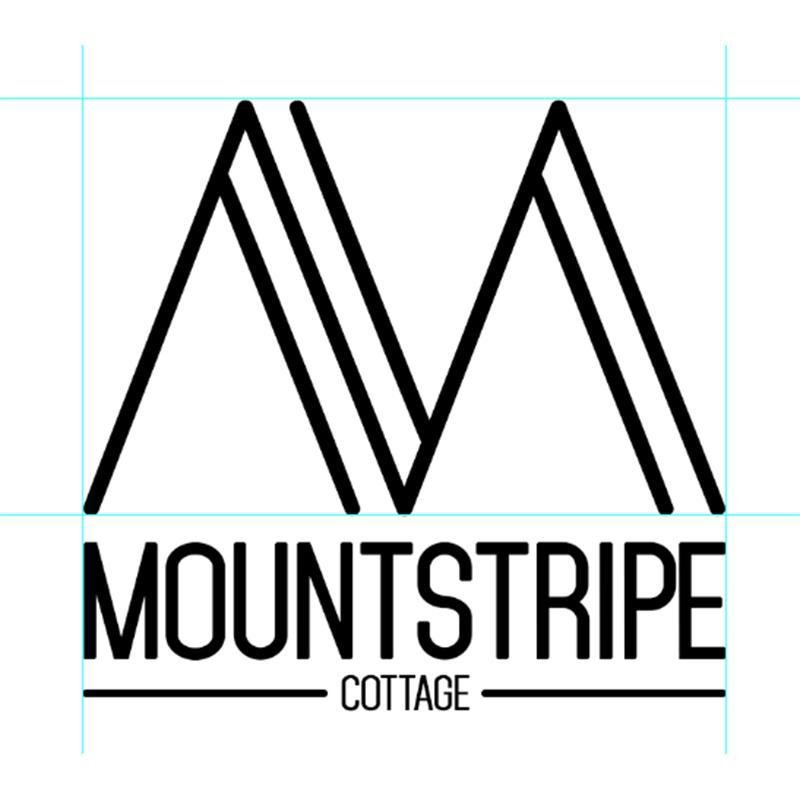
To make the cottage and the stripe align, it’s the same thing. Choose the stripes and cottage layer and then choose “Align Vertical Centers”.

Now, because we make the logo in Photoshop, the logo is not a vector. When you input it in a web and stretch it will become pixelated. Thus, we have to insert the logo into Illustrator.
Illustrator Section
Step 11.
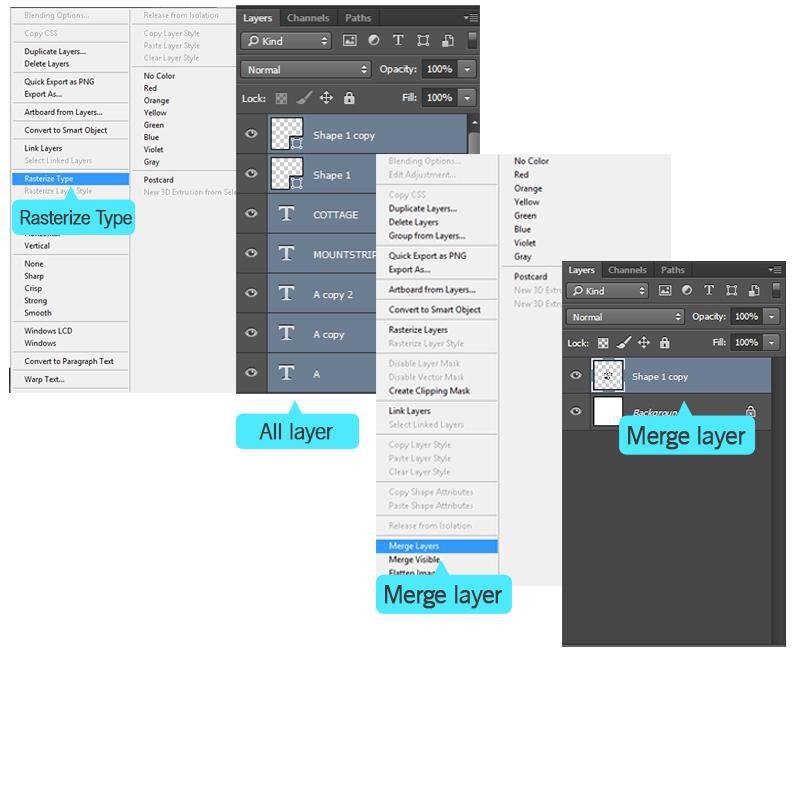
To insert the logo into the Illustrator, you have to select all layer, right click and then choose rasterize type. After you rasterize it click right and choose merge layers to combine all the layers.
Step 12.
Open your Illustrator when you done merging the layer. Create new file and then click ok.

Step 13.
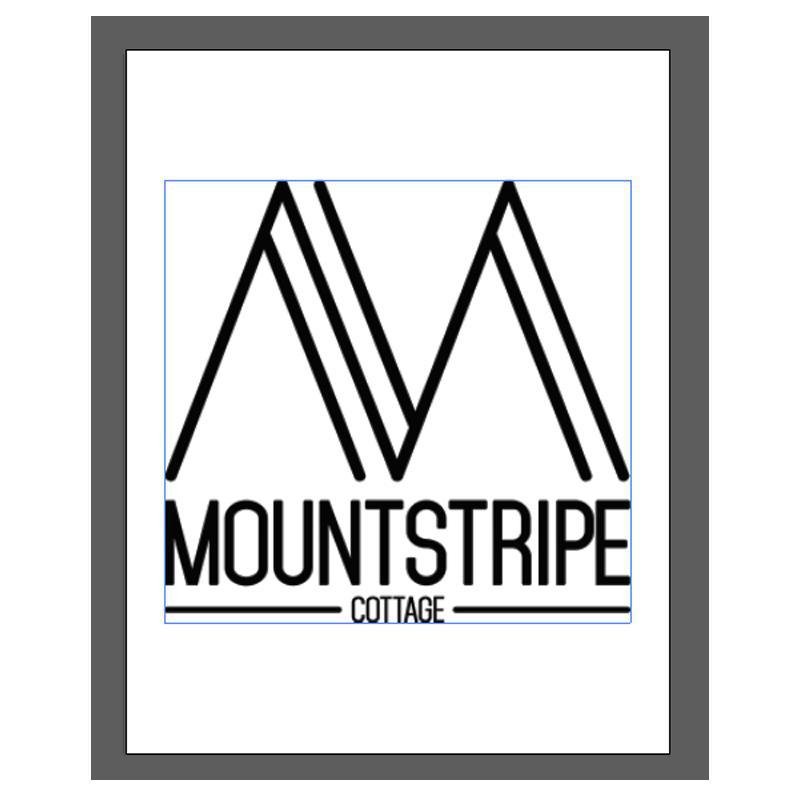
After the file is created, you can just go back to the Photoshop and drag the layer into the illustrator. The logo will be bigger than the canvas, so you can zoom out (hold alt + scroll down), click the edge of the logo and minimize it while holding shift. Adjust the logo so it will fit inside the canvas.
Step 14.
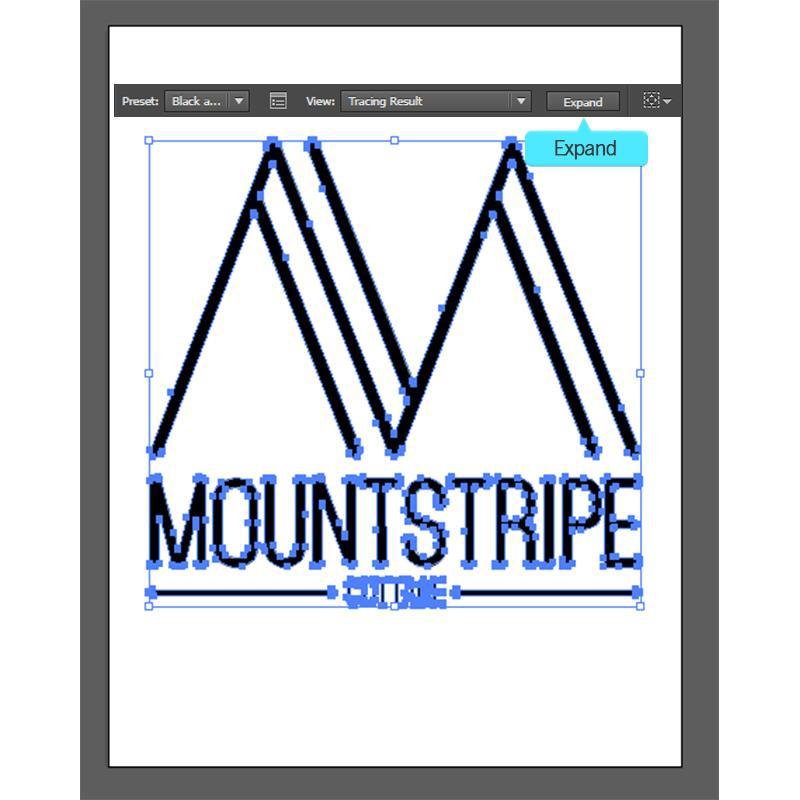
Make sure you click the logo then click tracing presets (small arrow facing down) which located on the top and choose black and white logo.

Step 15.
Now, the expand button will show up at the top. You click it and then the logo will have a blue point all over it.
Step 15.
Here is the important part so do it carefully. After you expand, press Ctrl + Shift + G twice to copy the path then you can click on the white area of the logo and press delete. Next, you select all the remaining white area by holding shift and press delete.

This step is to make sure there are no white background when you save the file in PNG or any type of file you want.
Step 16.
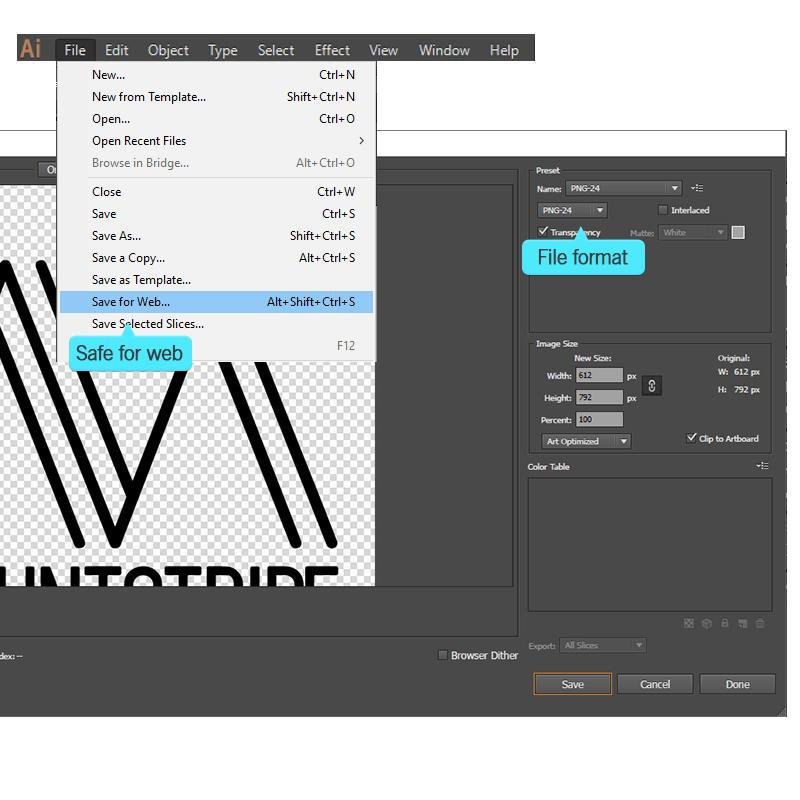
And the logo is finished, you now can save it by choosing save for web (Alt + Shift + Ctrl + S). Before you press save, make sure that the format is PNG and there are no white space within the logo.
Congratulation, your logo is now finish. I hope the tutorial is helpful for you who wants to make a professional logo design. The less you design, the more it gets. Good luck!
Download The Logo for Free:
[sociallocker]Mounstripe Cottage Logo (PSD)[/sociallocker]
About the Author!
Aditya Citratama, a 19 years old graphic designer freelance from Jakarta, Indonesia. He is specialized in logo, UI and web design. With experienced in using Adobe Photoshop tools and still learning Adobe Illustrator. He also love to play games and reading books. Kindly check out more of Aditya’s works on Instagram @aditctm. You also can contact him directly via email, cheers!
