If you run a YouTube channel, it will be useful for you to know how to make a YouTube banner in Photoshop with an original description and call to action, since the background image (banner, header) is the first thing a YouTube user sees when he/she goes to your channel.
The recommendation system works in such a way that first a person sees a video and only then, if he/she is seriously interested in the content and goes to the channel, discovers a banner.
Therefore, you need to work hard to produce qualitative videos with sound and colors being on point. If you want to spend your time recording videos, let FixThePhoto video editing service help you.
7 Steps to Create a YouTube Banner in Photoshop
If you don’t want to deal with complex Photoshop tools or you simply don’t have a Creative Cloud subscription, then you can use the free FixThePhoto YouTube banner maker online to cope with the task.

Step #1. Choose a Template for Your Future Photoshop Banner
The first thing you need to take care of is a template with the specific dimensions for YouTube. I downloaded it from the official YouTube help site and opened without problems in Adobe Photoshop. The template shows what the dimensions of the channel banner are.
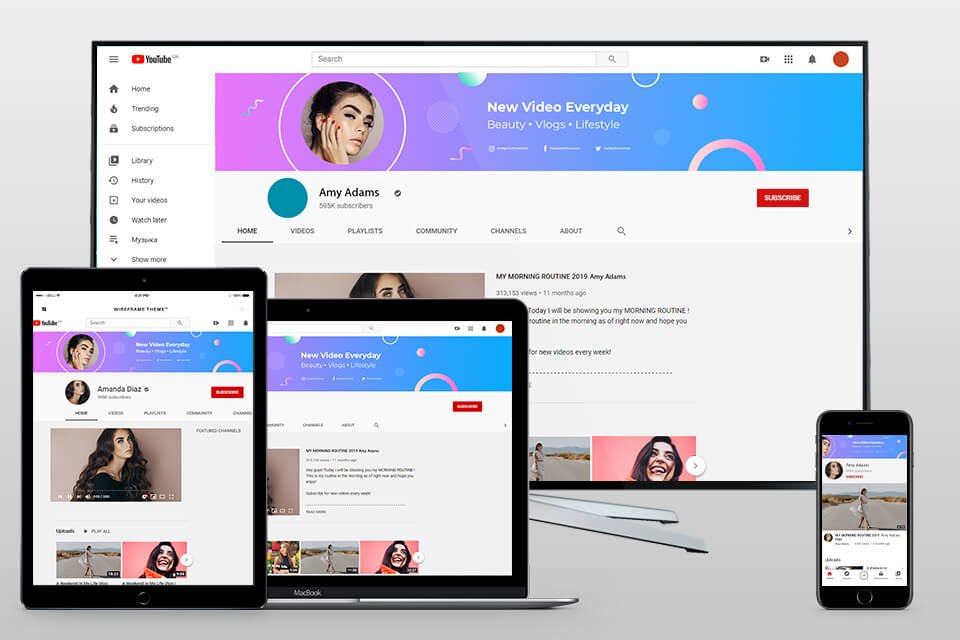
2560×1440 pixels. The minimum banner size should be 2560 by 1440. If the size is smaller, YouTube won’t accept such a picture, and you won’t be able to use it as a banner. This template shows how the banner will look on different devices. It is very important. The full banner size (2560×1440 pixels) will be displayed on TV only. Other sizes are meant for such devices as PCs, laptops, tablets, and phones.
1546×423 pixels. Those using mobile devices, will see a part of a YouTube banner with the size of 1546 by 423 pixels. Actually, there will be displayed such a rectangle on all mobile devices. The rest of the banner will be invisible. Therefore, if you place some important information in these parts, then the audience won’t simply see it.
1855×423 pixels. An 1855×423 pixel rectangle will be displayed on tablets, which means that people visiting your channel from such devices will see a bit more info.
2560×423 pixels. The piece of a banner (2560 by 423 pixels) will be displayed on laptops with Full HD resolution. Keep this in mind while arranging info across the banner so that it’s most important part lays within this area.
Step #2. Work with Layers
Hold Ctrl+Shift+N (Command+Shift+N) to create a new layer.
Think of the most suitable background color and select it by pressing Shift+F5 or using an integrated Color Picker.
Mind that a one-color background may look uninteresting, so experimenting with a gradient effect may bring a riveting result.

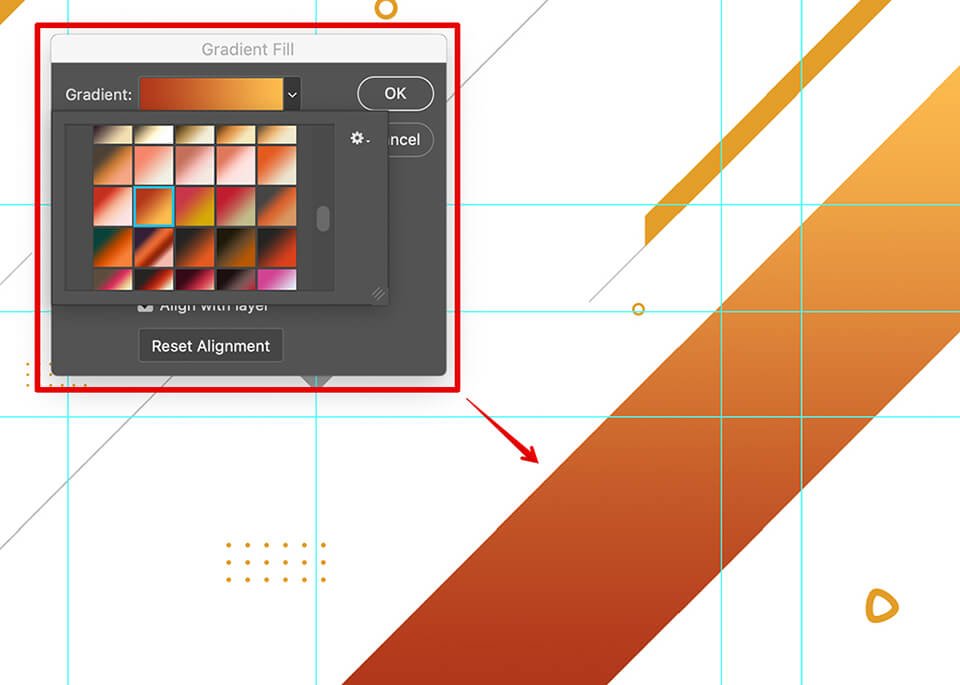
Step #3. Gradient Tool
Select the Gradient Tool and choose foreground and background colors. This is a simple thing to do by clicking on tiny colored squares in the lower part of the left toolbar.
Left-click on any edge of the canvas, hold, drag the pointer to the opposite edge and release. Thus, you will add a gradient effect composed of the colors you’ve chosen.
While dealing with a gradient effect, you need to focus on your channel’s aesthetics and choose colors correspondingly.
Step #4. Add the Channel Name and Logo
The channel name and logo are probably the most important elements that make you recognizable among numerous YouTube users.
That’s why, be mindful while adding them to your banner and think about how they will look on different devices with varied screen sizes. This means you need to place the most significant info in the rectangle-shaped area that is marked in templates.
Use the drag-and-drop approach to complement your banner with the logo and resort to the Horizontal Type Tool to insert any inscription.

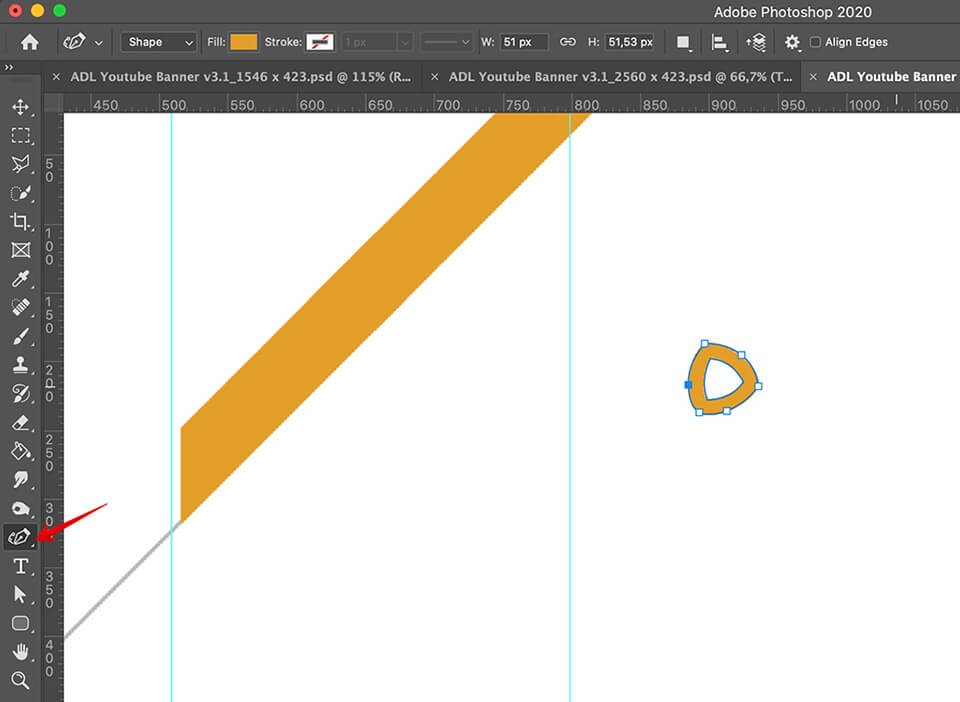
Step #5. Add Graphics
Now your banner contains the name and logo of your channel, you can add some engrossing graphics. If you have none at your disposal, search the web for suitable, copyright-free packs that can match the style of your channel.
Download the graphics and open files in Photoshop. Select the necessary piece by click on the layer and then press Ctrl+C (Command+C) to copy it.
Return to your banner and hold Ctrl+V (Command+V) to paste the graphics onto the banner. Work a bit on how the image looks, change the dimensions and alignment with the help of the Transformation tool Ctrl+T (Command+T). You may need to use several pictures to create an enthralling composition matching the topics you discuss.
Step #6. Duplicate a Layer
Right-click on the layer and choose “Duplicate Layer” from the drop-down list. Use the Transformation Tools once again to give all the elements of your banner a balanced look.

Step #7. Save the File
Once you are done creating a banner, save the result in a PNG format by holding Ctrl+Shift+S (Command+Shift+S). There will appear a list of output options and you need to choose PNG.
That’s it. Now you know how to set up a banner for YouTube on Photoshop and can upload your creation to the media sharing platform.
And if you need to promote a kind of do my essay review website https://nocramming.com/domyessay-review, you may find this guide useful.
Why Do I Need It?
The YouTube banner can be used not only as a design element but also as a tool to increase brand awareness, to advertise external resources, announce promotions, contests, etc.
Also, you can use a short introductory video with your logo or two-second cutouts with pieces of a video combined together as a trademark. Come up with an interesting idea, install a video editing or visual graphics software, use free video overlays from FixThePhoto to add creative effects and produce a branded intro that you’ll add to every video on your channel.