In this tutorial, I am going to show you how to make a simple burger logo by using lines and basic shapes.
You will learn how to design burger logo step by step, which will allow you to gain the knowledge to apply these techniques to create other simple line logos. By the end of the tutorial, you will have a knowledge to design your own logo!
Let’s get started!
Pro Tip: Check out these 90+ Delicious Burger Logo Designs for your inspiration
What You Will Need
You will need the following resources in order to complete this burger logo design:
- Adobe Illustrator
- Montserrat font, free download here
Step 1: Set Up a New Document
Go to [File] > [New…], and enter the following:
- Name : Burger logo (optional)
- Profile : Basic RGB

Step 2: create Rectangle
Click “Rounded Rectangle Tool” on the sidebar, then please the “Preferences” button on the top bar. Inside the menu “General” change “Corner Radius: 30pt”. After that click “OK” button.


Choose “Stroke: 6pt” and choose black as the border color. Then create a square shape by using “Rounded Rectangle tool”, like the picture below.


Step 3: Cut Half of Rectangle
Click “Rectangle Tool” on the sidebar, then make a square shape that covers part of the square shape that was made before.


Then please select all object by clicking on form “Layer” on the right sidebar.

At the form “pathfinder” on the sidebar please choose “Shape Modes: Minus Front”


Step 4: Add Small Circles to The Object
Click “Ellipse Tool” on the sidebar, then choose background color: Black and Border color: none.

Create small circles


Step 5: Create a Line
Click “Line Segment Tool”, then choose “background color: none”, “Stroke: 6pt” and Border color: black.

draw a horizontal line

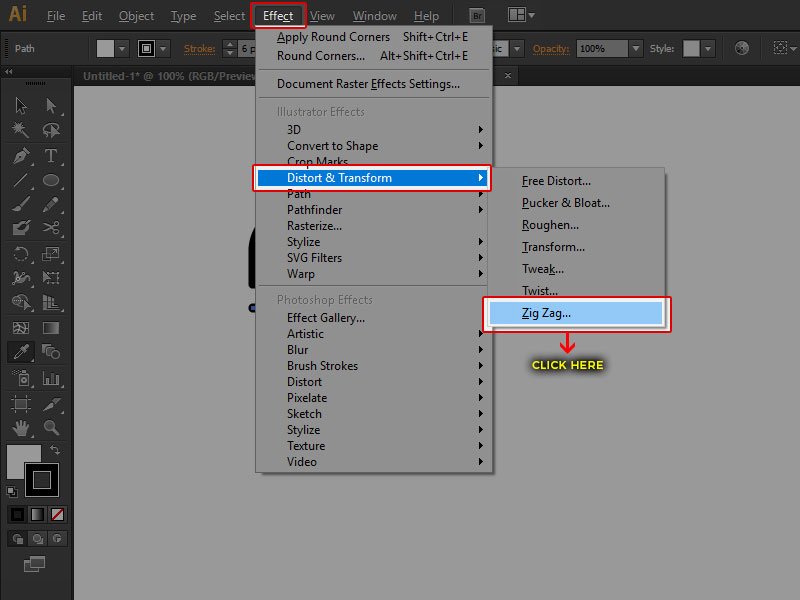
Change from line shape to zig zag, by choosing on the menu “Effect” -> “Distort & Transform” -> “Zig Zag”

At the form “Zig Zag” fill “Size: 5 Pt”, klik “Absolute”, “Ridges per segment: 5”, then click “Smooth”, then click “OK”

Fix the line object, click menu “Object” and choose “Expand Appearance”


Step 6: Add Your Brand Name
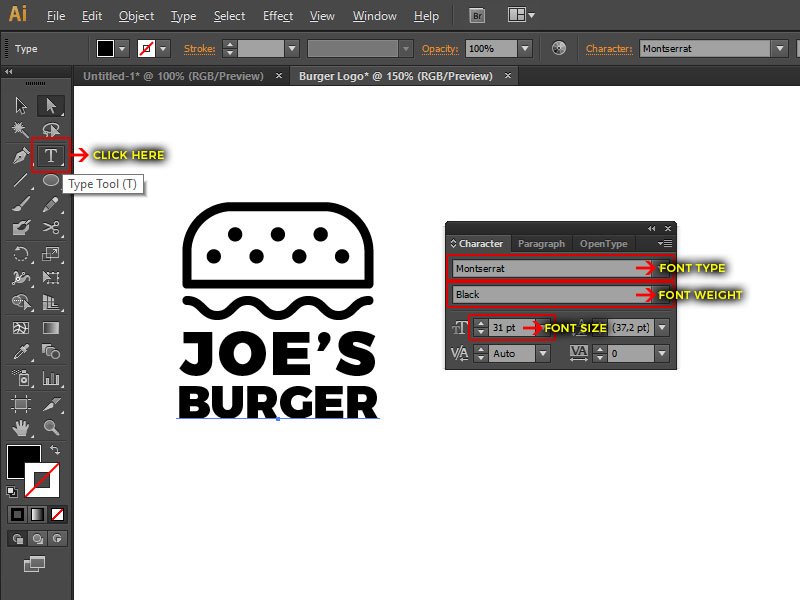
Click “Type Tool”, set font: “Montserrat”, font weight: “Black”, Font size “41 pt”

Add another text, Tool”, set font: “Montserrat”, font weight: “Black”, Font size “31 pt”

Step 7: Create capsul object
Click “Rounded Rectangle Tool” on the sidebar, then choose “Stroke: 6pt”, Border color: Black, and Background color: None. Then make a shape like in the picture below


Step 8: Add bottom object
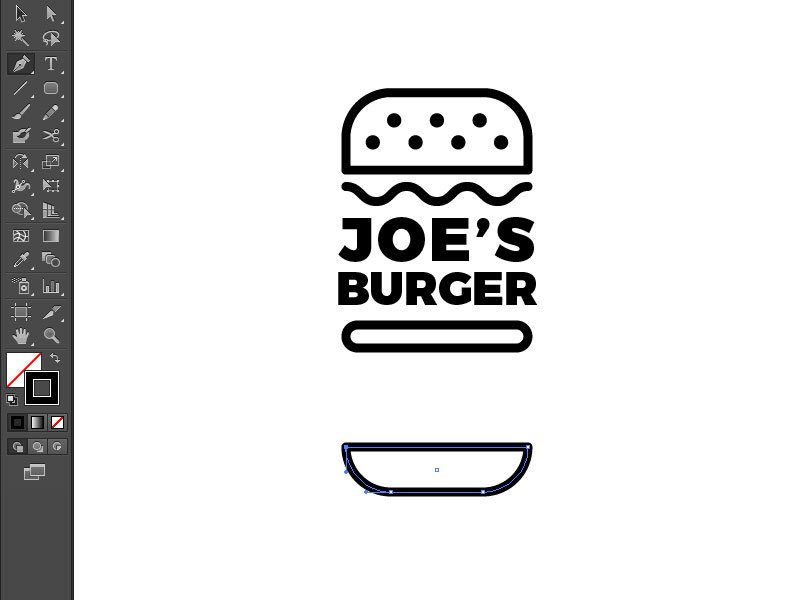
Click “Rounded Rectangle Tool” on the sidebar, then choose “Stroke: 6pt”, Border color: Black, and Background color: None. Then make a shape like in the picture below

With “Pen Tool”, erase some points from the object by clicking one by one point marked with a circle in the picture below.


Move object


Step 9: Add Triangle Object
Click “Rectangle Tool” on the sidebar, then choose “Stroke: 6pt”, Border color: Black, and Background color: None. Then make a shape like in the picture below.

Rotate 45 degree

With “Pen Tool”, delete the dot from the object by clicking the dot circled in the image below.

Move triangle to bottom object


Final Result
And here is the final result:

Our burger logo design is finished! You can now create a variety of simple line logo using all the techniques you learned in this tutorial.
I hope you enjoyed making this logo.
